Welcome
We really appreciate that you decided to try our application. You have several options to start your journey:
- Create your own login for the application (see How to Register) and follow Quick Start steps below
- Use the demo login (see How to Login) with the following credentials:
- Login: [email protected]
- Password: Family#01
In our demo you can see the full history of one expat family for the period from June 1, 2016. You can read the full story of that family in our blog.
Note: We update the demo data weekly on Sunday.
- Check our Getting Started help topics
Good luck and thank you!
Quick Start
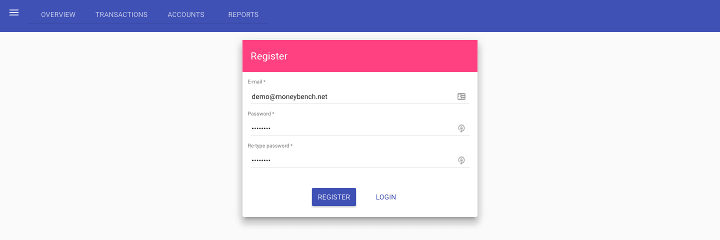
- Click Try Now
- Enter text in the E-mail and Password fields
- Click the Register button
Accounts
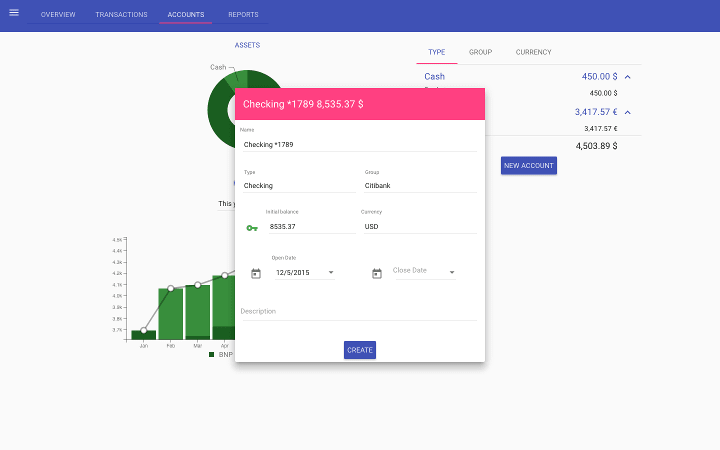
- Click on the Accounts tab
- Click the New Account button
- Enter the name in the Name field
- Enter new or select the type and the group from auto-complete lists in the Type and Group fields
- Enter the initial account balance in the Initial balance field
- Select the account currency or keep the default value in the Currency field
- Select the open date of the account in the Open Date field
- Optionally, enter the description of the account
- Click the Create button to create the account
- Accounts with positive balance are grouped in the Assets chart
- Accounts with negative balance are grouped in the Liabilities chart
Categories
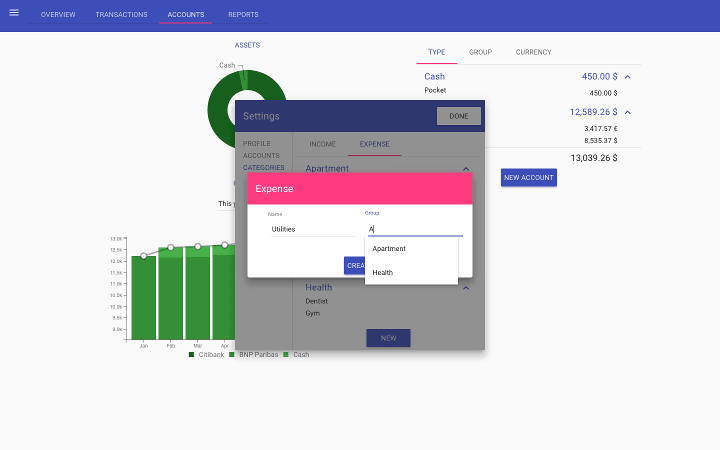
- Click the Menu> button in the top left corner to open the sidebar
- Click the Settings button to open the Settings dialog
- Select the Categories tab
- Click Income or Expense tab
- Click the New button
- Enter the name in the Name field
- Optionally, enter new or select the group from the auto-complete list in the Group field
- Click the Create button to create the income or expense category
- Click the Done button to close the Settings dialog
Transactions
- Click on the Transactions tab
- Click the New button
- Select the transaction type: Transfer, Income or Expense
- Enter the transaction amount in the Amount field
- Select the source account in the From Account auto-complete list
- Select the expense type in the Expense Type auto-complete list
- Optionally, enter the description in the Description field
- Click the Create button to create the transaction and close the dialog, or click the Copy button to create the transaction and keep the dialog open with all fields filled, except the Amount and Description fields
Reports
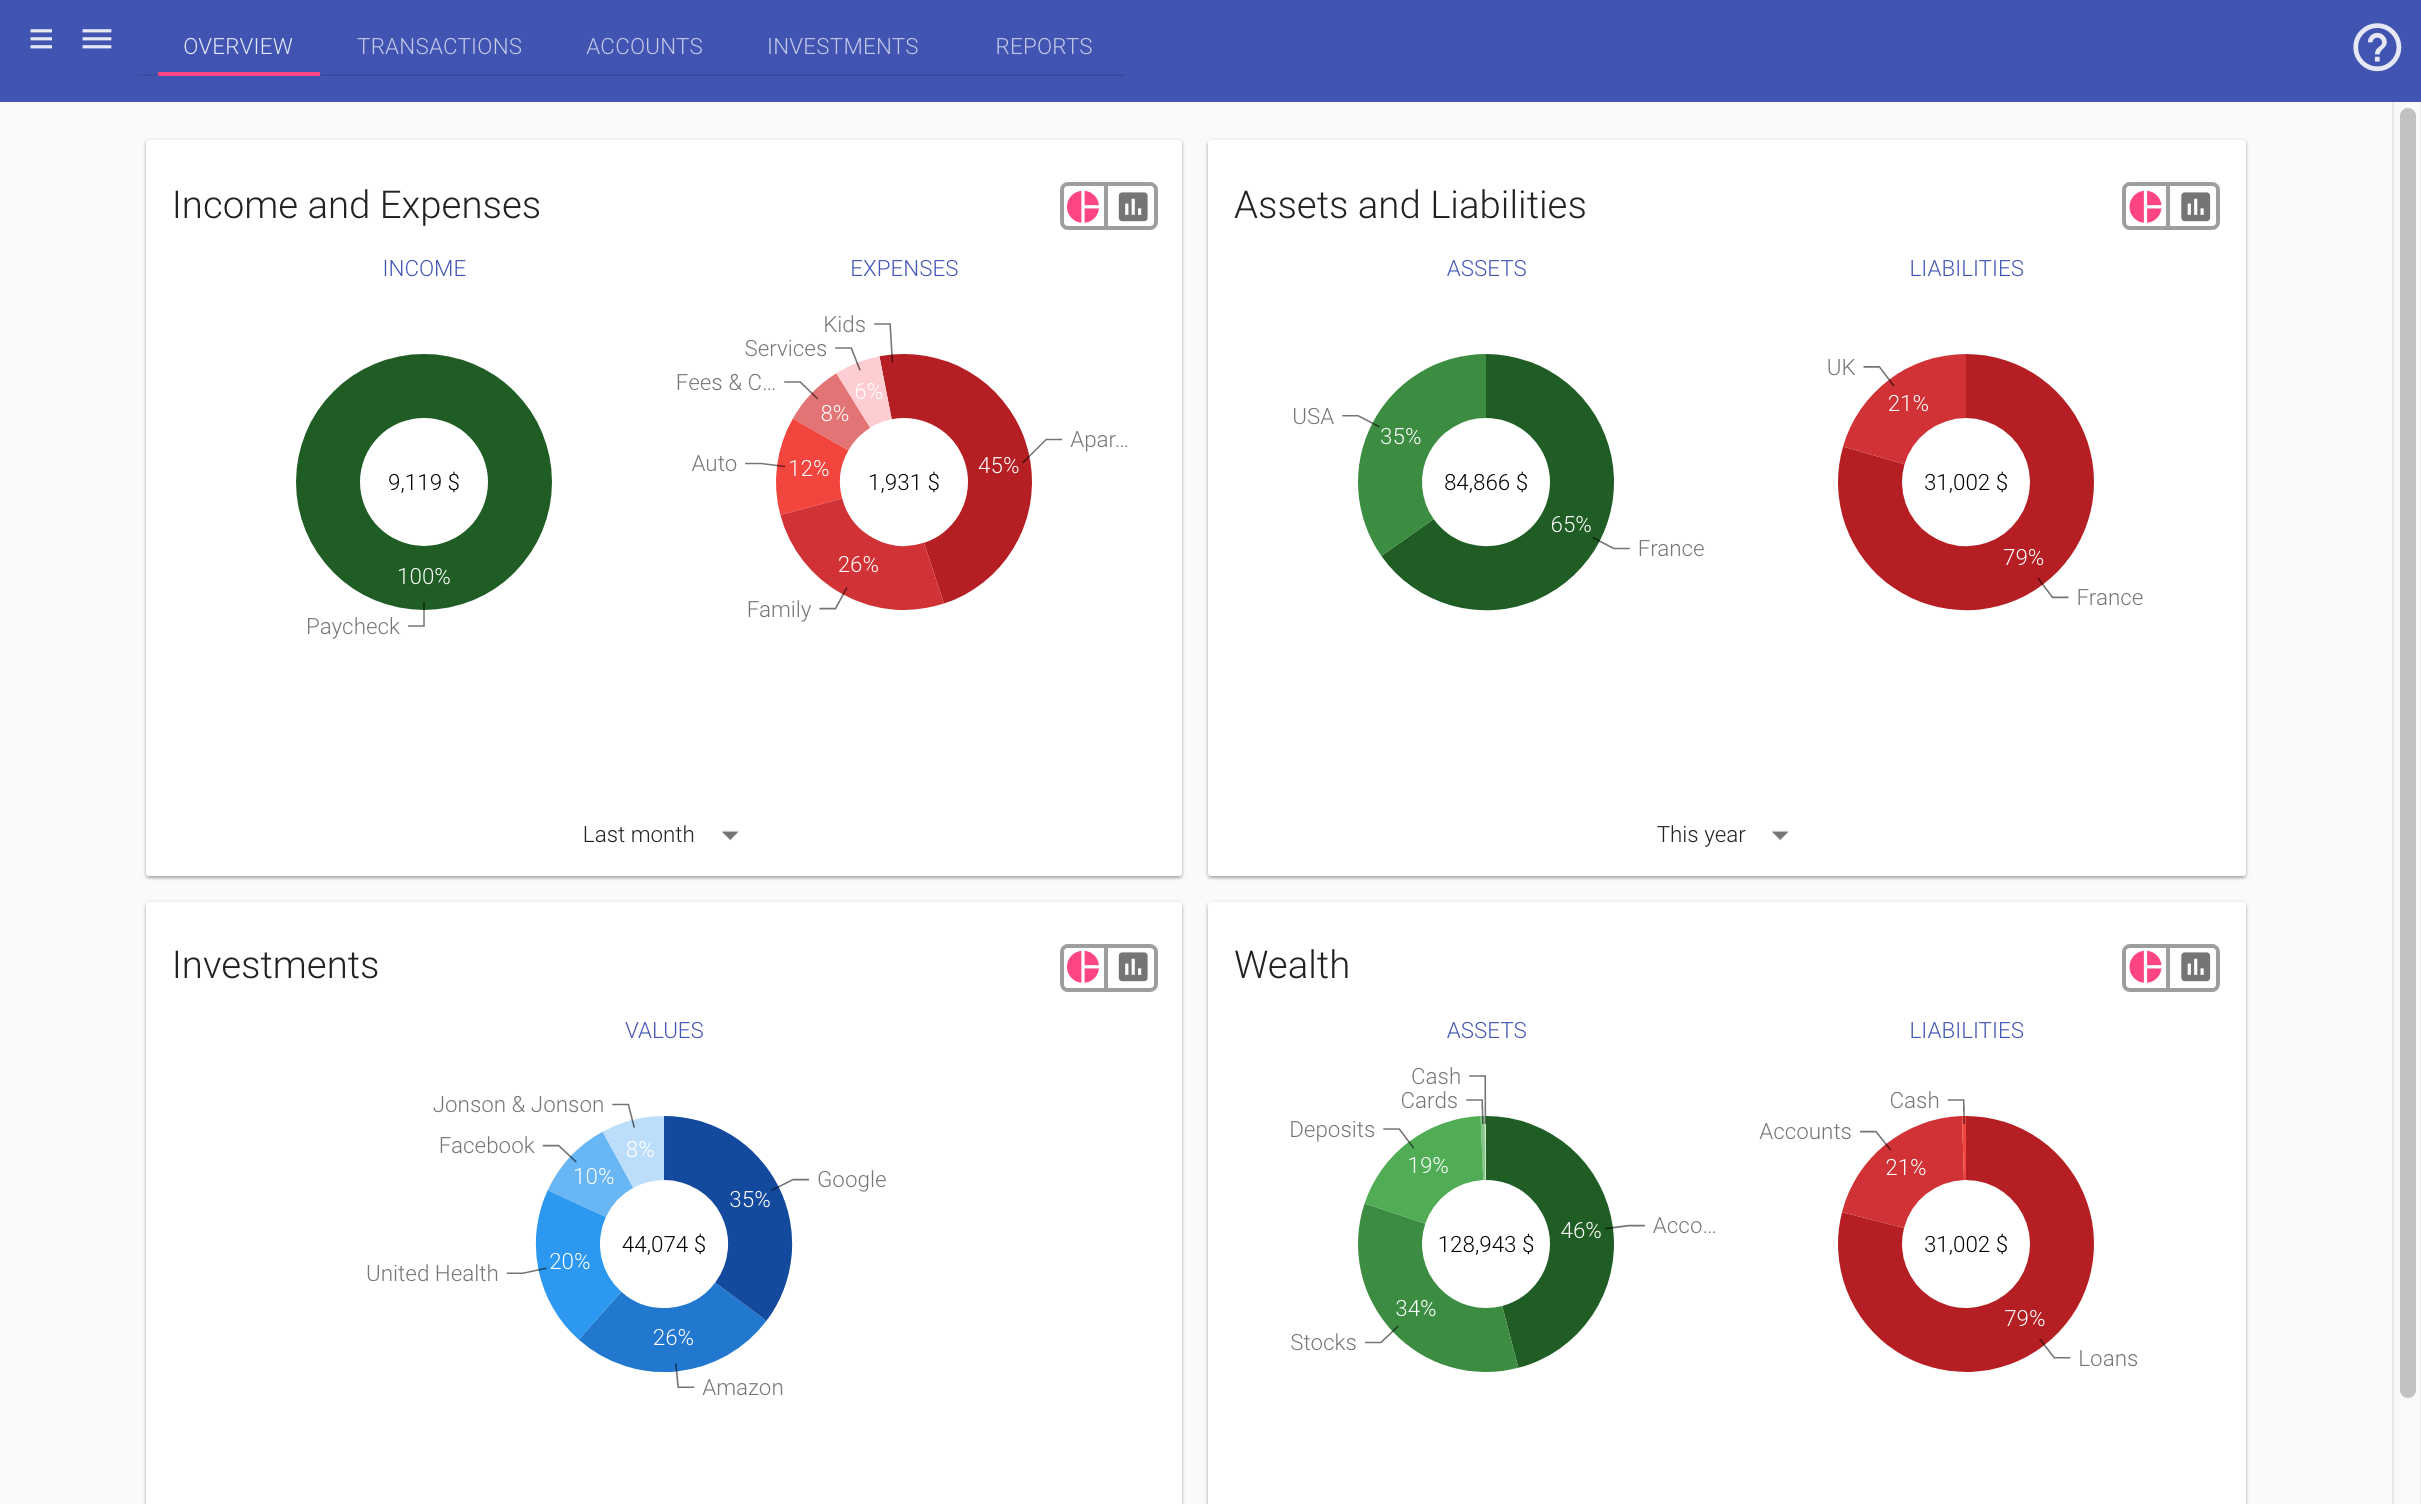
- Click on the Overview tab
- Select the report period for the accounts (left) and income/expenses (right) charts
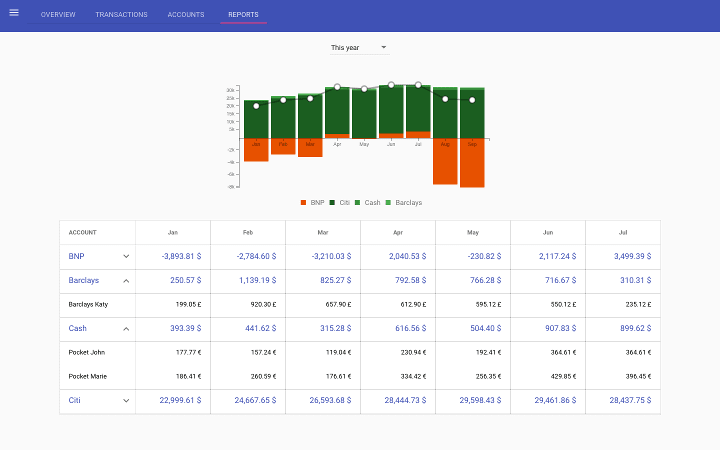
- Click on the Reports tab
- Select the Accounts menu item
- Select the date range for the accounts chart and table
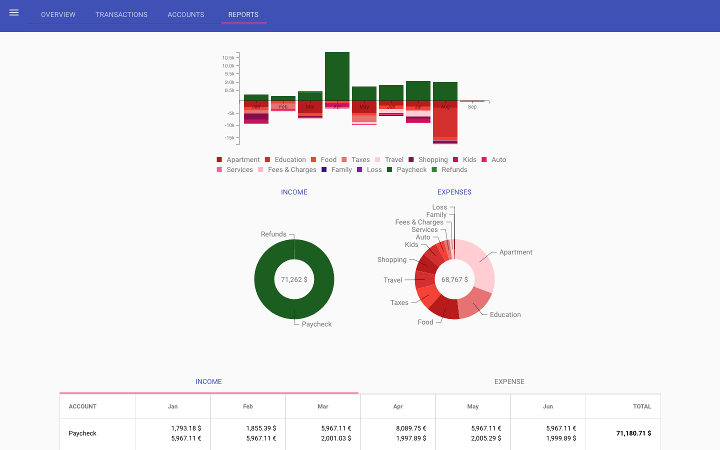
- Click on the Reports tab
- Select the Income/Expenses menu item
- Select the date range for the income and expenses charts and tables